Joint
The properties of this component are rather obscure and difficult to understand. A few examples will be provided at the end of this section to help with comprehension.
WARNING
Items used in the Joint component cannot be linked-type items, and all items must have a Physics Object component.
Connect Self
- Type:
bool - Default:
true
WARNING
When Connect Self is set to true, please ensure that the item itself has a Physics Object component.
Physics Object AConnect Self = false
- Type:
Item - Default: Empty
One of the physics objects connected by the joint.
Physics Object B
- Type:
Item - Default: Empty
The other physics object connected by the joint.
TIP
Physics Object B can be empty. When empty, the joint only applies constraints to a single physics object.
Enable Collision
- Type:
bool - Default:
false
Whether to keep the collider effect in the physics object enabled. If there are no special circumstances, please keep this value as false to ensure smooth movement and rotation.
Auto Set Connection
- Type:
bool - Default:
true
Joint Point
Used to set the connection point between two physics objects. The visualized position will be displayed in the scene as a multi-colored sphere.
Position
- Type:
Float3 - Default:
(0, 0, 0)
Axis
- Type:
Float3 - Default:
(1, 0, 0)
Perpendicular Axis
- Type:
Float3 - Default:
(0, 1, 0)
Joint Constraints
Used to set the constraints between two physics objects. Multiple constraints can be added.
Constraint Type
- Type:
Linear | Angular - Default:
Linear
Constrained Axis
- Type:
Bool3 - Default:
(false, false, false)
Min Max
- Type:
Float2 - Default:
(0, 0)
Enable Spring
- Type:
bool - Default:
false
When the spring is enabled, it allows the physics object's range of motion to exceed the constraint range. A spring force will be applied when the object goes beyond the constraint range; the further it exceeds the range, the greater the spring force. There is no spring effect when it is within the range.
Spring Elastic
- Type:
float - Default:
0.0
Spring Damping
- Type:
float - Default:
0.0
Examples
Stone Block
TIP
This example demonstrates the complete process of using a joint and utilizes the Road Generator to generate a mesh, so no external files need to be imported. It is suitable for beginner practice.
For mapping, please use the ready-made item: Assets → Items → Machinery → StoneBlock.
- Create the stone block.
Create → Road Generator- Set
Generator TypetoCorner
- Set the Physics Object properties.
- Set
Collider TypetoBox, do not change the collider-related parameters. - Set
Physics Body TypetoRigid. - Adjust rigid parameters as needed.
- Place the object in a suitable position.
- Set
- Add and set up the Joint.
- Enable the
Jointcomponent. - Set 2 constraints:
- A linear constraint, locking the
xandzaxes, ensuring the object can only move along theyaxis. - An angular constraint, locking the
x,y, andzaxes, ensuring the object cannot rotate. - At this point, the joint behaves as a prismatic joint (similar to a sleeve, piston, etc.).
- A linear constraint, locking the
- Do not change other parameters.
- Enable the
- Test in the game. The stone block should now work correctly.
Push Board
TIP
This example demonstrates a situation that requires modeling and then importing a mesh.
For mapping, please use the ready-made item: Assets → Items → Machinery → PushBoard.
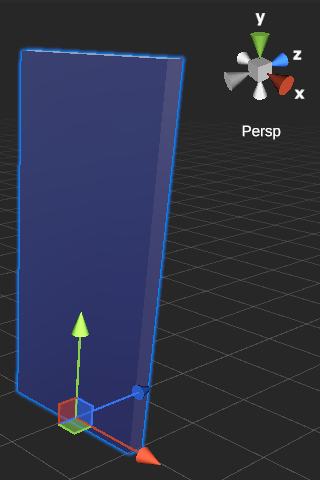
- Modeling.
- Use modeling software to create a rectangular prism.
- Assume here that the push board rotates around the
x-axis. - Reference dimensions:
x = 1m,y = 2m,z = 0.1m.
- Assume here that the push board rotates around the
- Set the pivot point to the center of the bottom face.
- You can use the rotation tool in your modeling software to rotate around the
x-axis to test if it meets expectations. - UVs and material matching are not considered here.
- Use modeling software to create a rectangular prism.
- Add and set up the object.
- Import the mesh created in the previous step.
- The wood material is located at
Assets → Materials → Utility → Wood. - Please complete the other steps yourself.
- Add and set up the Joint.
- Add 2 constraints:
- A linear constraint, locking the
x,y, andzaxes, ensuring the object cannot move. - An angular constraint, locking the
yandzaxes, ensuring the object can only rotate around thex-axis. - At this point, the joint behaves as a revolute joint (similar to a collar, hinge, etc.).
- A linear constraint, locking the
- Please complete the other steps yourself.
- Add 2 constraints:
- Test in the game.
- The push board should now be able to rotate freely.
- You need to add limiters and slightly rotate the board to tilt it, ensuring it is in the correct initial position and can work properly.
Float Board
TIP
This example adds the use of a linear spring. Please use this example to practice the various operations!
For mapping, please use the ready-made item: Assets → Items → Machinery → FloatBoard.
- Please model and import the mesh and materials yourself, or use existing assets.
- Save the mesh of
Assets → Items → Machinery → FloatBoard. - Set up 3 materials:
Assets → Materials → Machinery → Machinery_WoodAssets → Materials → Machinery → Machinery_Target_GreenAssets → Materials → Machinery → Machinery_Steel
- Save the mesh of
- A linear spring is needed on the
y-axis.- Add a linear constraint, constraining the
y-axis. - Check
Use Linear Spring. - Set the spring parameters as needed.
- Reference:
Spring Elastic = 0.5,Spring Damping = 0.25.
- Reference:
- Add a linear constraint, constraining the
- Please complete the other steps yourself.
- Test in the game.